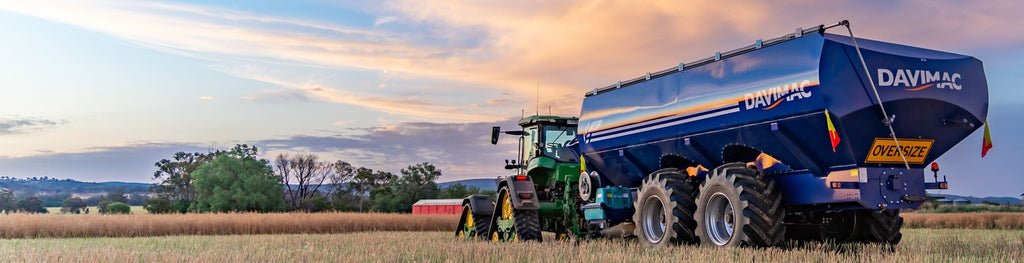

Pre-harvest chaser bin maintenance checklist
An hour in September saves a day in November. The 12-point pre-season checklist, in the order the work should be done.
Pre-harvest chaser bin maintenance checklist
An hour on the chaser bin in September saves a day in November. The bin sits idle for ten months and then works flat out in heat and dust for six weeks, which is exactly the duty cycle that finds every neglected grease point and perished hose. Work through this checklist before the header rolls, in roughly this order, and confirm anything model-specific against your owner's manual in the manual library.
The 12-point pre-season checklist:
- Grease and lubrication
- Gearbox and chain drive
- Augers, flights and cross auger
- Hydraulics
- Tyres, rims and wheel nuts
- Hitch, drawbar and safety chain
- PTO shaft and guards
- Roll tarp
- Cleanout doors and bin interior
- Scales and load cells
- Lights, beacon and signage
- Fire fighting equipment
1. Grease and lubrication
Work through every grease point on the machine, including the outload auger bearings and any remote greasing points fitted for hard-to-reach bearings. Grease points are marked with labels on Davimac bins, and the ones that get missed all year are the ones that need attention most; if a nipple won't take grease, find out why now rather than mid-harvest. Check the manual's lubrication chart for which points are pre-season items and which run on 50-hour intervals through the season.
2. Gearbox and chain drive
Check the gearbox oil level and condition, and inspect the chain drive for tension, wear and stiff links. A dual-chain drive is simple and rugged, but a chain that runs loose through harvest stretches, wears sprockets and eventually jumps. Adjust tension to the manual's spec, and if the oil is due for a change, do it now while parts and time are cheap.
3. Augers, flights and cross auger
Open the bin and inspect the vertical and cross auger flights for wear, damage and buildup, and check flight-to-tube clearance hasn't blown out. Run the augers empty and listen: rumbles and knocks are bearings asking politely before they ask expensively. Check the auger fold cycle, the spout adjustment and the shut-off door all operate smoothly.
4. Hydraulics
Inspect every hose for perishing, chafe and weeping fittings, especially where hoses flex at the auger fold. Check couplings are clean and caps are on. Cycle every function (fold, spout, gate, jack if hydraulic) before the first load, not during it.
5. Tyres, rims and wheel nuts
Set pressures to the inflation chart in your manual for the loads you'll carry (correct pressure is free compaction management as well as tyre life), and make pressure checks a weekly habit through harvest. Inspect for cracking, cuts and weathering after the machine has sat, check rims for damage, and torque every wheel nut to the manufacturer's figure. Kondinin Group's chaser bin research lists loose wheel nuts and rim damage among the most common faults found in the field; wheel nut indicators are a cheap way to spot movement at a glance. Re-check torque daily for the first three days after any wheel has been off, then weekly.
6. Hitch, drawbar and safety chain
Inspect the tow eye or ball for wear and confirm it still matches your tractor's drawbar pin, check the rubber cushioning on the drawbar, and inspect the safety chain and its attachment points. Check the jack stand holds, raises and stows properly.
7. PTO shaft and guards
Inspect the PTO shaft, universal joints and, critically, the guard: it must spin freely on the shaft and be undamaged. Grease the shaft, check the tractor-end connection locks positively, and confirm the auger protection guard is in place. If the bin is going behind a different tractor this season, check the shaft length suits it; our guide on how to cut and install your PTO shaft covers the procedure.
8. Roll tarp
Run the tarp fully open and closed, check for tears and UV damage along the folds, and confirm the locking mechanism holds over rough ground. A tarp that jams mid-harvest gets left open, and then it rains.
9. Cleanout doors and bin interior
Open all cleanout doors, confirm the lever operates freely, and clear any grain or nesting from last season; old grain harbours insects that contaminate the new crop. Check bin windows are clean enough to actually see through from the cab.
10. Scales and load cells
If the bin runs scales, check cabling for rodent damage and connector corrosion, confirm the indicator powers up, and plan a calibration check against a weighbridge docket early in harvest. Drifted scales are worse than none, because you trust them. How the systems work, and the calibration habit worth building, is covered in how chaser bin scales and weighing systems work.
11. Lights, beacon and signage
Test tail lights, hazard lights, the amber beacon and the auger work lights, and check the oversize sign and flags are present and legible. Faded safety decals should be replaced (replacements are available from Davimac); they're the operating instructions your casual harvest labour will actually read.
12. Fire fighting equipment
If a fire unit is fitted, fill the tank, run the pump, and check the hose reel unwinds and the nozzle works. Check the extinguisher is charged and in date. The chaser bin lives next to the header all harvest, which makes it the first responder to the most common harvest fire; our guide to chaser bin firefighting options compares the setups.
Found something bigger?
Pre-season checks exist to find problems while there's still time to fix them. Worn flights, tired hydraulics and structural cracks caught now will avoid a costly breakdown. Davimac's refurbishment service handles exactly this work on current and older machines. If the list of repairs is starting to read like a deposit on something newer, that's a real decision worth making properly. Genuine parts for the fixes you're doing yourself are in the Davimac online spare parts store, with delivery to you or your dealer.
New to running a bin, or breaking in a new operator this season? Our guide on how to operate a chaser bin at harvest covers everything from positioning under the header to unloading on the move. And for what a well-maintained machine should be delivering in the first place, the Davimac chaser bin range sets the benchmark.
Quick answers
When should I service my chaser bin?
Before harvest, every year, even if the bin barely worked last season. Sitting idle is its own wear mode: perished hoses, flat-spotted tyres, stale grease and rodent-damaged wiring all happen in the shed. Work the full checklist four to six weeks before harvest so parts can arrive before you need them.
What are the most common chaser bin faults?
Kondinin Group's field research lists loose wheel nuts and rim damage among the most common faults, alongside the usual suspects: dry bearings, loose chains, perished hydraulic hoses and worn auger flights. Most are cheap to catch pre-season and expensive to discover mid-harvest.
Should old grain be cleaned out of a chaser bin?
Yes, completely, before the new season. Residual grain harbours storage insects and moisture that contaminate the first loads of new crop. Open every cleanout door, clear the bin floor and auger sump, and check the cross auger housing where grain sits unseen.