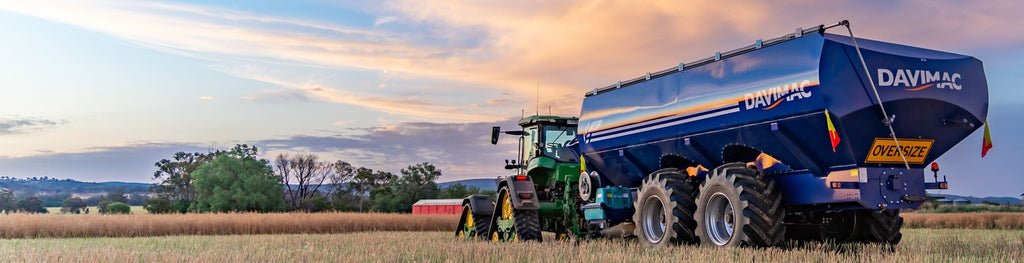

How to operate a chaser bin at harvest: A Driver's Guide
The job most often handed to the newest person in the crew, explained properly: setup, positioning, filling, the auger sequence and the safety non-negotiables.
How to operate a chaser bin at harvest: A Driver's Guide
Driving the chaser bin is the harvest job most often handed to the rookie, the backpacker, or the newest person in the crew, but it's also the job that sets the pace for everything else. The header only keeps cutting if the bin keeps up. That pace has a real dollar figure: GRDC puts the combined cost of running a harvester and chaser bin at $500 to $800 an hour, whether the header is cutting or standing still. So every minute the bin costs the header in waiting time, is money spent and wasted.
The mechanics of driving a chaser bin are learnable, often in a day. Learning judgement, positioning, timing and load management in this guide will aid first-season operators and the people training them.
Note:, This driver's guide sits alongside (not instead of) the operators manual for your machine; Davimac manuals for your manual are all available in the manual library.
In this guide:
- Before the first shift
- Step 1: Positioning under the header
- Step 2: Filling the bin evenly
- Step 3: The run to the truck
- Step 4: Unloading
- Protecting grain quality
- Step 5: Moving between paddocks
- The safety non-negotiables
- What good looks like
- Quick answers
Before the first shift
Set the machine up once, properly.
PTO Shaft:
The PTO shaft must be cut to suit the tractor it will run behind: too long damages bearings and mountings, too short can disengage. If a different tractor model is required, a new PTO shaft will need to be sourced and cut. We've covered the measuring and cutting procedure step by step in how to cut and install your PTO shaft.

Hitching:
Match the swivel ball hitch to your tractor's drawbar pin (two ball sizes ship with the machine), set the hitch height with the tongue level, and attach the safety chain to an anchor rated for the full loaded bin.
Prestart Checks:
Make pre-start checks a daily habit, straight from the manual:
- PTO length and guards in good condition
- Wheel nuts are tight
- Tyre pressures to spec
- No oil leaks
- No foreign objects in the bin
- Chassis checked for cracks
- Auger in the working position (not transport position)
- The bin is securely hitched to the tractor.
- Wheel nuts set to correct torque (Wheel nuts deserve special respect early: check them daily for the first three days on new or refitted wheels, then weekly through the season.)
Comms
Sort communications before grain moves. Agree UHF channels and call conventions with the header and truck drivers, and agree who calls the unload: usually the header operator says when they're ready, and the bin confirms position. Most chaser bin incidents are two machines with two different assumptions.
Step 1: Positioning under the header
The header unloads on the move, so your job is to hold a steady position under the discharge auger while both machines travel forwards. When coming up to the header:
- Approach from behind on the header's unloading side (usually the left).
- Match ground speed before you close in.
- Let the header operator bring the auger over the bin.
- Hold your line off the header, not off the bin; small steering corrections at the tractor become big movements at the bin.
- On many farms on CTF tramlines, there will already be an existing track to follow. Check whether your bin's wheel centres can be set to match your system's row spacing. Get that sorted before harvest starts, not during it.

It's important to keep your eyes moving between the header's spout and the path ahead. Remember, you're driving one machine and watching two. If anything feels wrong, ease off and come back in. A small amount of grain on the ground costs less than a header auger through the bin wall.
Step 2: Filling the bin evenly
Grain lands where the header spout points, so work the fill along the bin rather than building one peak. Start toward the front, drift position gradually by speeding up slightly, and finish at the rear. The bin should be filled evenly so the load on the tractor hitch neither lifts nor slams down on it, and an even fill keeps weight distributed across the undercarriage as designed.
Watch the fill through the bin windows or camera rather than guessing, and avoid heaping the last few tonnes; a level load travels well, a peaked one may spill on the first contour bank.
Step 3: The run to the truck
A loaded bin handles nothing like an empty one. Speed limits vary by model (check your manual), but the principle is generally not to travel above 10 km/h when loaded and allow more braking distance. Always brake in a straight line to avoid a jackknife, which can occur suddenly without warning when you brake while turning with a few dozen tonnes pushing from behind. Take contour banks and washouts at an angle and reduced speed, and treat side slopes with respect. The load raises the centre of gravity, and a low-profile bin is forgiving, not immune.

Plan the route between header and truck once, early in the paddock, rather than improvising it every load. If you're running controlled traffic, keep to the established tramlines. If not, follow the header's wheel tracks where the ground allows. A loaded bin is the heaviest thing in the paddock, and laying fresh lines every load spreads compaction across ground you haven't already committed.
Step 4: Unloading
Position parallel and close to the mother bin or truck, and agree on the fill order before grain moves (front trailer first is the usual convention, but it's the driver's call). Never turn the tractor or park on an angle with the PTO engaged, as it damages the universal joint.
To commence unloading, follow the auger start sequence:
- Stop the machine
- Check overhead for power lines and obstacles
- Fold the auger out
- Engage the PTO at idle
- Bring the revs up
- Open the grain flow doors
Use the spout to aim and place the grain and walk the stream along each compartment of the receiving truck or mother bin. Pay attention, as a wandering spout with 18 tonnes a minute through it's 24 inch auger puts a tonne on the ground in just over 3 seconds.
Shutting down has its own sequence:
- Close the flow doors first
- Drop the revs to idle
- Let the vertical auger empty
- Disengage the PTO
- Wait around 30 seconds for residual grain to run back before folding the auger down.
Emergency Stop and Restart:
The emergency stop (disengaging the PTO under load) is for genuine emergencies only. Used routinely it compacts grain at the auger base and wears the machine. If the auger does compact, close the flow doors, open the cleaning door on the vertical auger to relieve the blockage, then restart at idle with the doors still closed and open them slowly once the auger is running clear.
If the bin runs scales, fill the truck to the agreed weight every load. How the systems work is covered in chaser bin scales and weighing.
Protecting grain quality
The chaser bin is the first place grain sits after leaving the header, which makes the driver the first line of defence on quality, not an afterthought that happens later at the silo.
Watch moisture first. If part of a paddock is coming off wetter than the rest (a low spot, morning dew still burning off, or a change in the crop), keep that parcel separate rather than tipping it into an otherwise dry load. A small wet parcel can pull an entire load down a grade at receival.

Davimac bins feature a grain sampling valve as standard to easily check grain quality from the side of the bin.
Keep varieties and grades apart too. If you're running more than one variety, or segregating a malt line from feed grain, the chaser bin is exactly where they get mixed by accident. Run the discharge auger empty and use the cleanout doors when switching between parcels, rather than assuming the next load will flush the last one through.
Cleanout
At the end of each day, empty the bin completely and clean it out. Open the underside cleanout doors and blow out residual grain with a compressed air line. Grain left sitting overnight attracts moisture, insects and contamination, and a build-up around the auger base accelerates wear. It takes ten minutes and it matters.

Step 5: Moving between paddocks
Road moves are the highest-risk minutes of the shift. The bin must not be towed on public roads while loaded, so empty it first. Fold and secure the auger, stow the jack in its transport position, close the tarp, and confirm the beacon, tail lights, flags and oversize signage are all working and visible before you pull out.
Towing agricultural machinery on public roads means complying with your state authority's road rules. Know your machine's transport width and what your state requires before you reach the gate, not after.
Recovery from bogged bin
If the bin gets bogged, use the dedicated recovery points at the rear of the chassis with two 50-tonne rated D shackles, pulling parallel with the wheels. The tow hitch in the middle of the bin is rated to 3,000 kg and is not suitable for recovery. Stand well clear of recovery ropes and slings while tension is on them.
The safety non-negotiables
Read your manual's safety section and warning decals on the machine. Here are some 'must-never-do's' when operating or working near a chaser bin:
- Never enter the bin unless it's on level ground with the park brake on, the tractor disabled, and the PTO shaft and hydraulic hoses uncoupled. Augers do not give second chances.
- Never walk on top of the grain.
- Never ride on the bin or let anyone else.
- Keep hands, feet and loose clothing away from driven parts, and wear hearing protection (not noise-cancelling headphones, which mask the machine's warnings along with the noise).
- Know where the fire-fighting unit is and how to start the pump before the day you need it. The chaser bin is usually the closest water to the header, which makes its driver the first responder.
- Check for hydraulic leaks with cardboard, never a bare hand, as escaping fluid can penetrate skin.

Fatigue is the quiet one. The chaser seat is where 14-hour days get handed to the least experienced driver. Fatigue isn't the same as being tired. It's pushing the body past its limits day after day with no time to recover, and if concentration is going, say so and swap.
We've covered machine hazards, safe maintenance and the risk assessment process in our chaser bin safety guide. The operator's manual for your model is always available in the manual library.
What good looks like
A good chaser operator is measured by one number: how long the header spends stopped with a full tank. Get the positioning smooth, the fills even, the truck loads accurate, and the road moves boring, and you're doing the job properly. The Davimac chaser bin range is built so the auger, visibility and controls make the smooth version of this job the easy version.
Quick answers
How do you drive a chaser bin under a header?
Approach from behind on the header's unloading side, match the header's ground speed before closing in, and hold a steady parallel line while the header brings its auger over the bin. Steer off the header's position, keep corrections small, and ease away if anything feels wrong.
How fast can you tow a loaded chaser bin?
Check your model's manual, but as a general rule do not exceed 10 km/h when loaded and allow more braking distance than you think you need. A loaded bin more than triples the machine's empty weight. Brake in a straight line, and don't tow a loaded bin on public roads.
What is the correct auger start and stop procedure?
To start, stop the machine, check overhead for power lines, fold the auger out, engage the PTO at idle, raise the revs, then open the grain flow doors. To stop, close the doors, return to idle, let the vertical auger empty, disengage the PTO, and wait about 30 seconds before folding the auger down.
What licence do you need to drive a chaser bin?
On your own property, no licence is required regardless of bin size. On public roads, a standard car licence generally covers most tractor and chaser bin combinations, but once the tractor's gross vehicle mass passes 4.5 tonnes it becomes a heavy vehicle requiring the matching licence class, and a loaded bin can add width and weight that trigger oversize rules. Confirm current requirements with your state road transport authority before towing on public roads.